I Made 5 DIY Christmas Ornaments To Add A Personal Touch To My Christmas Tree This Year
Check out these cute, crafty ideas just in time for Christmas!

‘Tis the season to deck the halls and decorate your tree! Everyone has a different idea of the look they’re going for with their Christmas tree.
When it comes to ornaments, some people like the ultra-chic look of pricey ornaments, while others prefer the mish-mosh of hand-me-down ornaments that hold special memories.
Some people like to do the same thing year after year, while others go for a new look each holiday season. Whatever your Christmas tree decorating style may be, DIY ornaments can add a special homey element to your tree. Plus, they’re so unique!
To get myself in the Christmas spirit, I decided to try making some ornaments.
After giving it some thought, I couldn’t remember the last time I’d made an ornament, or if I ever had. I started to take a look around the internet and realized there were so many crafty ideas. I found some that seemed manageable, but still festive and super-cute, so I decided to give those a go.
It was admittedly a little bit of an uphill battle. My type A personality wants to take over when I’m crafting, but that’s totally not what crafting is about. It’s about letting loose and enjoying yourself and letting art happen. It’s a time to get messy and veer off the beaten path of directions and create something that’s your own. Art is meant to be imperfect, so I fought the feeling.
By the time I finished, I was beyond inspired. In fact, my usually Grinch-like self was eager to rush out and get a tree. I even considered making some more DIY Christmas ornaments to hang on my tree! After crafting these five adorable, fun DIY Christmas ornaments, you’ll be rushing out to your local tree lot to find one, too!
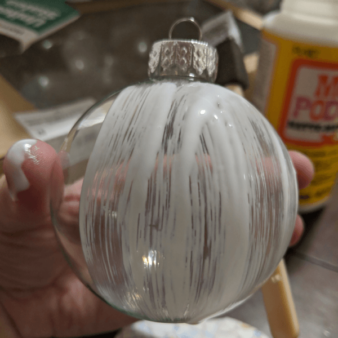
Painted Wood and Stamp Ornaments
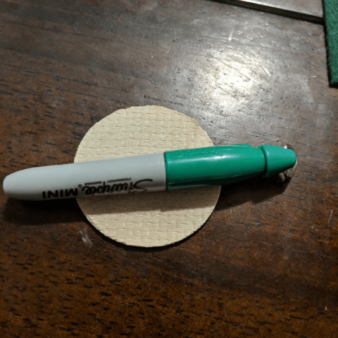
What I love about this ornament craft is that there are so many ways you can decorate it. I was inspired by the Beauty Dojo’s Mud Cloth Ornaments. The idea is to get shaped, dark-colored ornaments and use stamps and paint pens to decorate them.
If you don’t buy your ornaments already colored, there are a number of ways to DIY it: wood stain, markers, paint. I went with a Sharpie for this one. For the ornament, I found a variety bag of wooden shapes at Michaels.
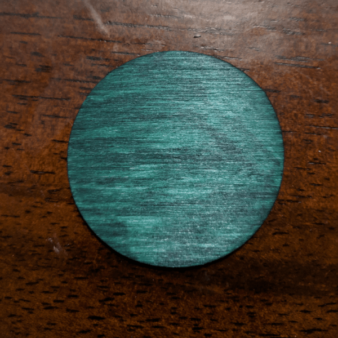
I really liked the way it came out with the green Sharpie. It was well-saturated with color without seeming too streaky. Next, it was time to add some letters.
To stamp your letters, first use a paint marker to paint the letter stamp, then carefully stamp it on the ornament. You might need to touch it up. If you don’t trust yourself with the marker, you can use a thin paintbrush to carefully dab at any gaps.
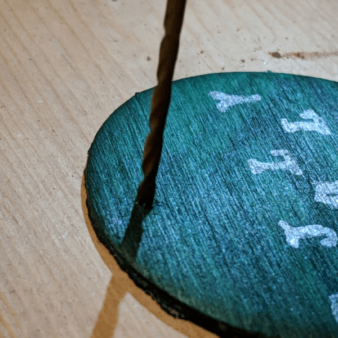
Next, you’ll need a small drill bit and a drill to put a hanging hole in the ornament. It takes just a few seconds. Once you’ve drilled the hole, feed ribbon or twine through it.

Here’s the finished product. What I loved about the stamps I used is that the letters were each in a different font, so the finished product looked simple but fun!
[sc name=”content-ad-horiz-1″]
Map Ornaments
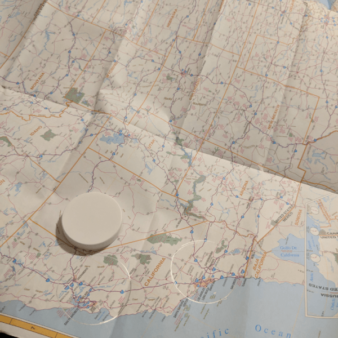
I knew I had to try this adorable idea by Gym Craft Laundry. Are you ready for a wild confession? I’ve never done decoupage. I don’t think I’ve ever even used Mod Podge before. The fact that it was easy and something I’d never tackled had me intrigued.
I traced the Mod Podge cap several times on a map, then cut the circles out.
Start with a layer of Mod Podge on a clear ornament.
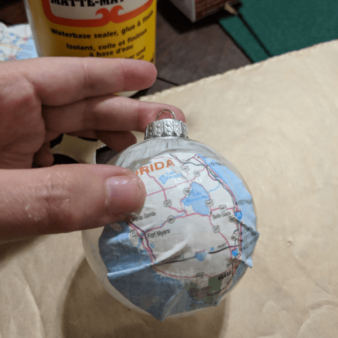
Next, place and smooth one of the map circles. Then apply Mod Podge over the paper as you smooth it, securing it to the ornament. Repeat, overlapping circles until they cover the whole ornament. It should take only an hour or two to dry, but I left it overnight.
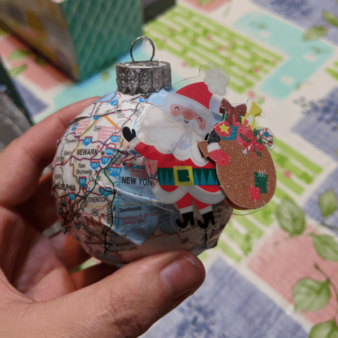
Since I didn’t have stickers as cute as Gym Craft Laundry’s, and I didn’t have access to a color printer to use its printables, I found my own little Santa to put on the map. He’s easy enough to remove, so you can move him around cities throughout the holiday season.
[sc name=”content-ad-horiz-2″]
Little Tree Ornaments
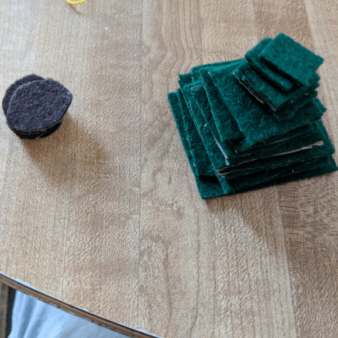
These super-cute little trees by Hello, Wonderful were simple and fun to make. All you need is green and brown felt, a needle, embroidery thread, and a star bead. I didn’t have the star bead, so you’ll see my creative solution.
First, cut your pieces. You’ll need five of each of the following in green felt:
- 1½-inch squares
- 1¼-inch squares
- 1-inch squares
- ¾-inch squares
- ½-inch squares
- ¼-inch squares
And five of these in brown felt:
- ½-inch diameter circles
Mine aren’t exact since I couldn’t find my ruler, but you can make them as perfect or imperfect as you’d like!
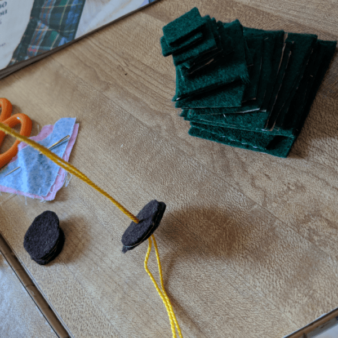
Next, thread your needle and start with the circle pieces. Get through the middle of your circles, then start with your squares. Go from the biggest squares to the smallest.
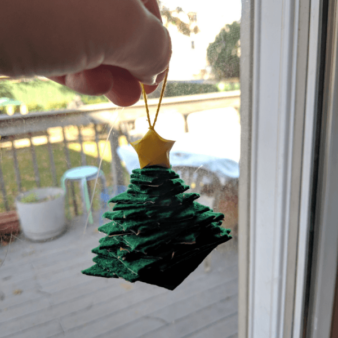
Since I didn’t have a star bead to use, I made an origami lucky star out of computer paper and colored it gold.
Once you thread through your star, cut the needle and make a knot. Knot the stump end of your tree as well and voilà! — you’re done!
[sc name=”content-ad-horiz-3″]
Sled Ornaments
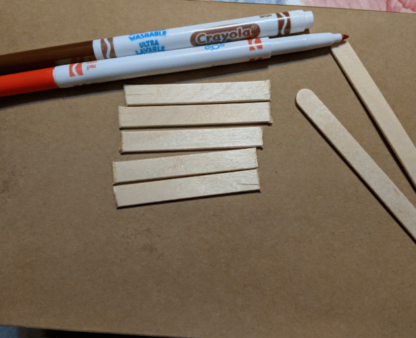
hese Popsicle stick sleds offer a similar versatility of materials as the wood and stamp ornaments. I was inspired by Clean and Scentsible but wanted something a smidge easier than using wood stain. I ended up using markers to color the Popsicle craft sticks. You’ll need two regular-sized craft sticks and five small ones. I had only regular-sized ones, so I cut them.
Tip: If you’re going to cut the craft sticks, BE CAREFUL! The pieces can go flying.
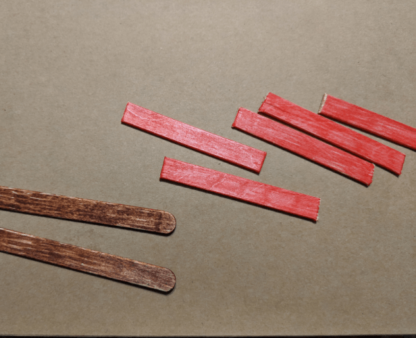
I colored the sticks with washable markers, so they aren’t super pigmented, but as I mentioned earlier, there’s no wrong way to craft. Once you’ve painted/stained/colored the small sticks your choice of color and the rest of them brown, glue four of the five small sticks together, staggering them slightly to make it look like an old-school sled.
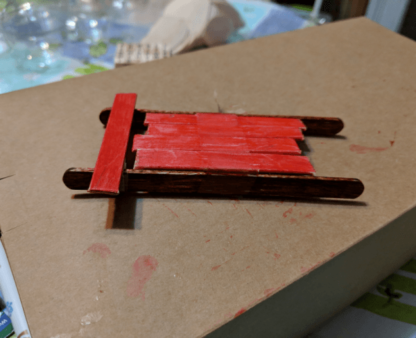
Once that dries, glue the row of colored sticks to the brown ones, with the final small stick being used as the front of the sled, across the front. Once all the glue has dried, tie some twine on it, and you’re set!
[sc name=”content-ad-horiz-4″]
Melted Crayon Ornaments
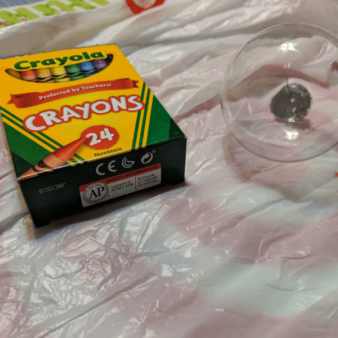
These looked like the most fun to put together. I’ve been dying to do a melted crayon craft, so this was fun and a less-messy way to start. Instructables has some awesome, simple directions for making these come to life.
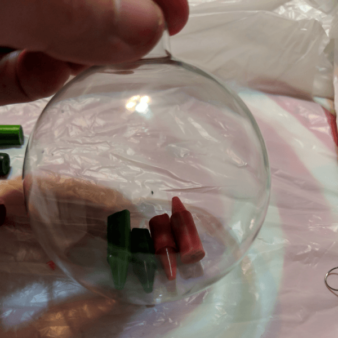
First, cut the crayons out of the wrappers, making sure to get any glue off them. It’s OK if you mess the crayons up a bit in the process, since you’ll be breaking them into pieces. Color choices are up to you, but I went with some classic red and green. Place the broken pieces inside the glass ball ornaments.

Next, use a hair dryer to heat the ornament enough to melt the crayons. Start at the lowest heat setting and turn it up as necessary.
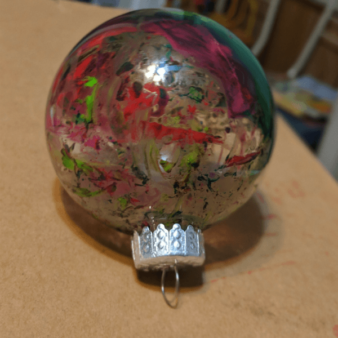
Once the wax starts melting, twist and turn the ornament to make a cool pattern. There’s no real technique to it, so just have fun! The finished products will be unique, visually interesting ornaments.
These ornaments are just the beginning of all the wonderful DIY ornaments you can make through the holiday season. A tree full of DIY ornaments feels more meaningful and more unique than the average holiday display.
More to Explore
SKM: below-content placeholderWhizzco for DOT