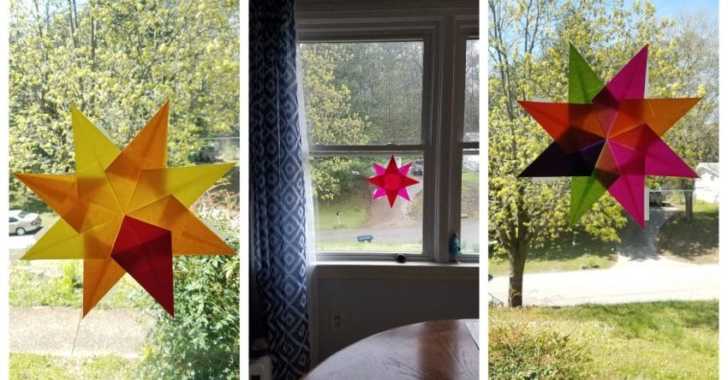
Waldorf Paper Stars Might Be The Uplifting Sweet Craft That All Of Our Kids Need Right Now
These are so easy and fun to make!

Like a lot of parents, I have suddenly found myself at home with a kid who needs a fair bit of entertaining, even though he’s nearly 11 years old.
I’m also working from home while managing his schoolwork and keeping up with the state of the world, and it’s all kind of … a lot. But why not add some crafts into the mix?
So when I saw on my social media feed that families were drawing pictures of rainbows and hanging them in their windows, I loved it. I thought about asking my kid if he wanted to do the same but figured I would get a noncommittal shoulder shrug in response.
Then my friend Julie, who is a true gem and a genuine human being, shared that she and her family have been making Waldorf window stars and hanging them up at home.
I had never heard of such a thing but quickly learned that making the stars isn’t too challenging at all. All you need is some kite paper, which Amazon was still shipping when I placed my order (but I bet you could also find it locally if you needed to, and your local arts and crafts store, if still open, would probably appreciate it), glue stick, and your own two hands.
Well, that and a willing participant.
There are LOTS of websites out there that will tell you how to make Waldorf window stars. And generally, the one basic pattern is the same, though there are a lot of varieties, and if you get really into it, who even knows what you can come up with?
What you need:
- Kite paper
- Glue stick
We chose to follow this pattern from Garden Mama. Waldorf window stars are pretty straightforward, so I’ll combine a few steps. Here’s how you start:
Choose eight sheets of paper, any color. I have made Waldorf window stars with all the colors of the rainbow! You really have a lot of agency here.
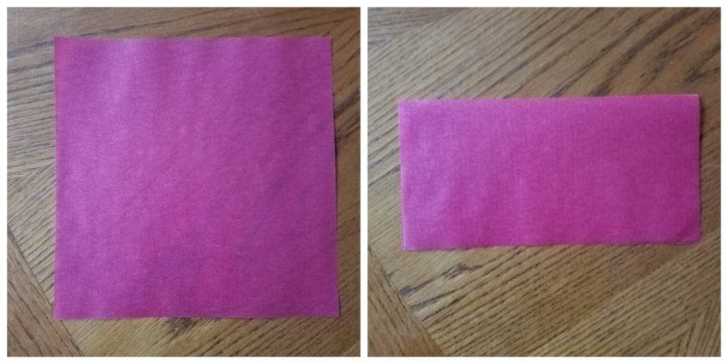
Select one sheet to start with, and fold that sheet in half lengthwise.

While your sheet is folded lengthwise, fold it in half again so that you’ve made a square. Then open up your square so that you have four clearly demarcated sections. You’ll be using each of those sections in the next step, and you want to make sure your lines are as even as they can be.
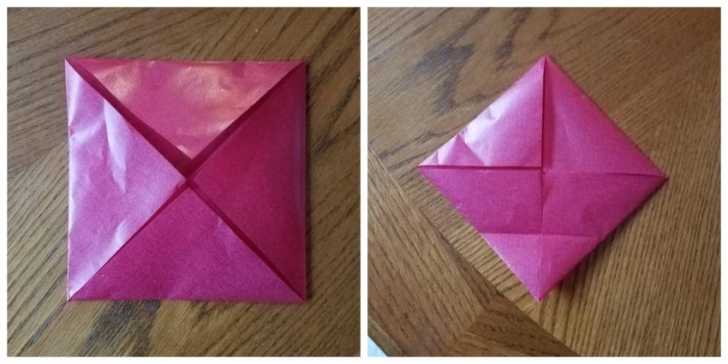
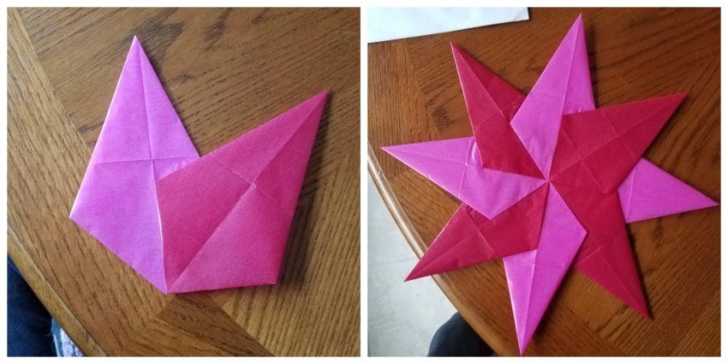
Fold each of your outside corners in toward the middle. If you have made a cootie catcher in your life, this will seem familiar! But wait — the next step is to rotate your square so that it makes a diamond shape. This step actually baffled me because it was not clearly demonstrated, so I made sure to take a photo for you! Fold the bottom corner up so the tip hits the center point, then unfold that corner so you have your diamond again.
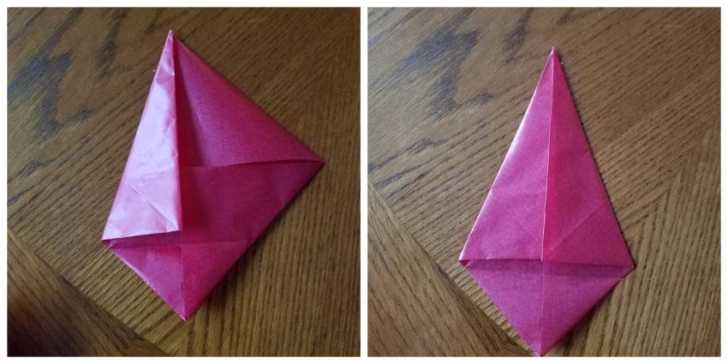
Now fold both outside edges toward the middle, to form the shape in the photos. Use the fold mark as the bottom edge guideline. I don’t know how to describe that shape in words, so I’m glad you have photos! When you finish, you’ll have the shape that you see on the right. This is one point of your star. Make several of these, in whatever colors you choose.
Use your glue stick to attach the first two star points at their bottom point, lining up the edge of one with the fold mark of the other, as photographed. You’ll continue to use the glue stick to attach each of the star points in turn. You *can* use liquid glue, but use only a tiny bit. Otherwise, it’ll bleed through the paper and turn into a sticky mess.
You can tape your star up with clear tape, and voilà! You’re finished.
SKM: below-content placeholderWhizzco for DOT