Vintage Thrift Store Bar Cart Restoration
Get inspired to restore some old thrift store furniture today!

If you’re anything like us, you love a good thrift store find. Sure, sometimes it takes a little bit to find exactly what you’re looking for, but sometimes you see just the thing you want – and you’re inspired to restore it and repurpose it right away! That’s exactly what happened to this thrift store savvy DIYer. Keep reading to see her fascinating process of restoring this vintage bar cart from the 70s into a beautiful and unique piece of furniture!
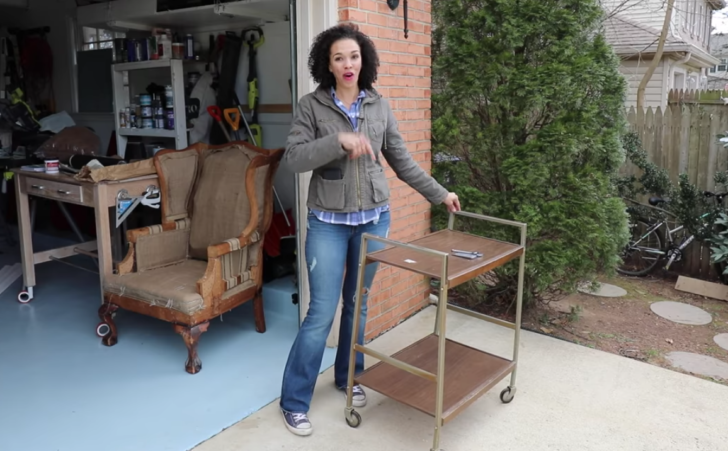
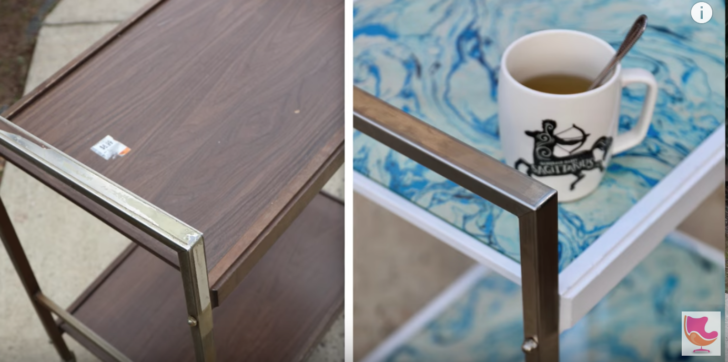
When this DIYer saw the vintage bar cart for $6.99 at her local thrift shop, she knew exactly what she wanted to do with it. As you’ll see in her process below, she had some amazing handmade, marbled paper that turned out to be the perfect touch to this newly restored bar cart!
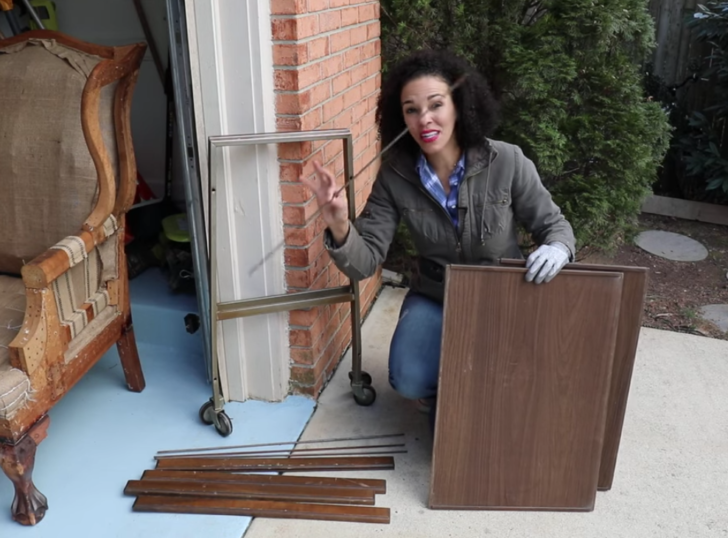
First things first, she had to take apart the bar cart in order to clean it up and strip it down into raw materials to give her something to work with.
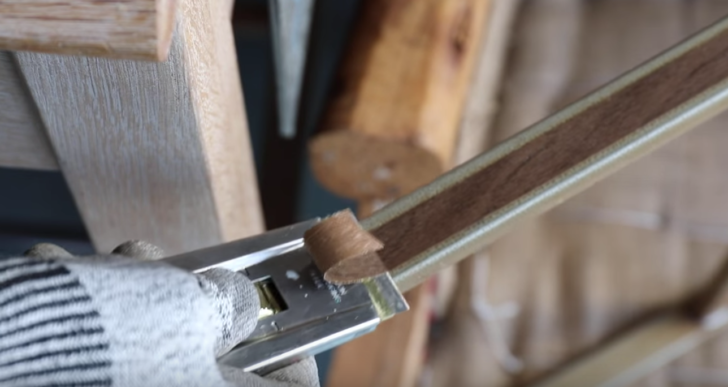
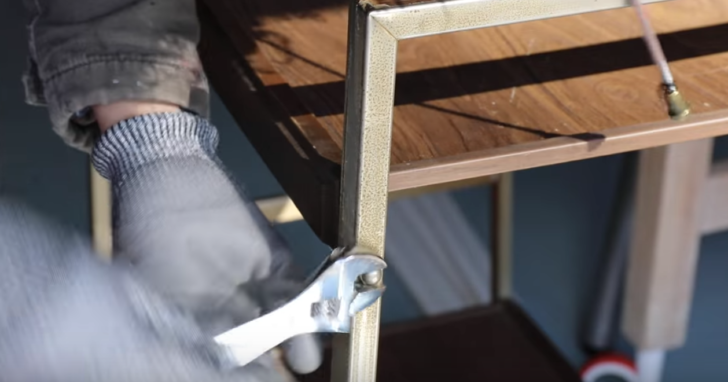
The sticky, wood-patterned laminate seemed like a formidable foe at first, but through trial and error, our restoration expert discovered that using a razor worked like a charm to rid the cart of the sticky mess.
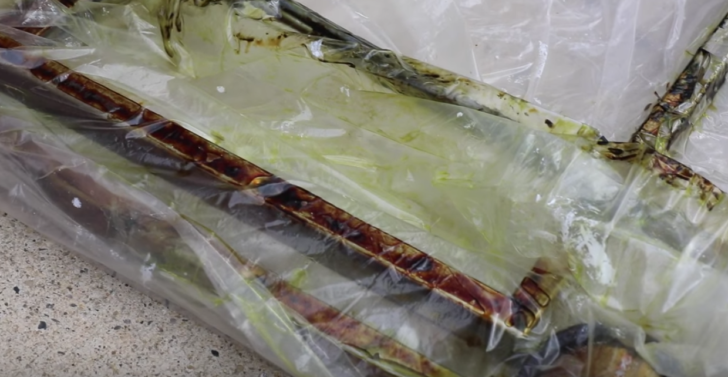
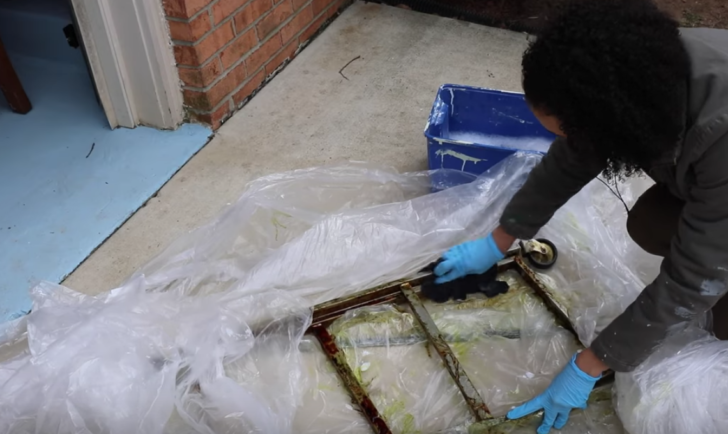
Once stripped of the gross laminate, it was time to strip the metal of its rust. By using a rust remover, the process proved to be easy and effective. She simply painted on the rust remover and wrapped all of the metal pieces in a plastic painter’s drop, letting it all sit for about 2 days. Then, she unwrapped it and began washing everything away with soap and water. As you can see, the rust came off with ease!
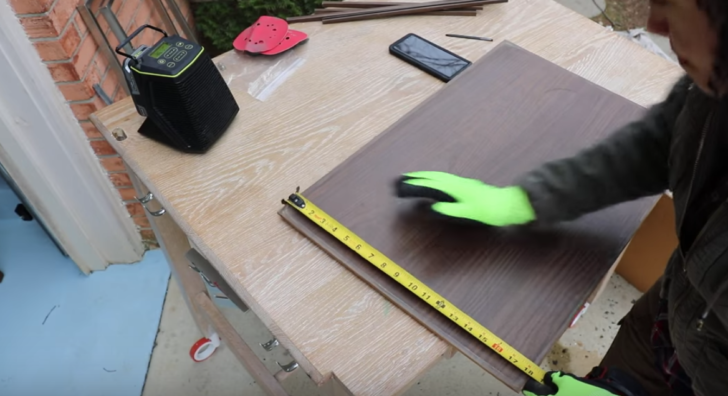
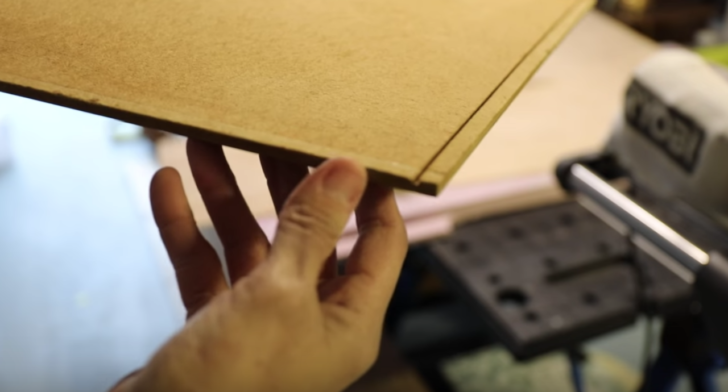
Next, it was time to remake the wooden shelves that made up the bar cart, since the ones it came with were warped. This DIYer had her own circular saw, but for those of us who don’t have those kinds of power tools, you can just as easily get pieces of wood cut at your local hardware store. Notice how she included a little divot in the wood so the side pieces could fit on properly.
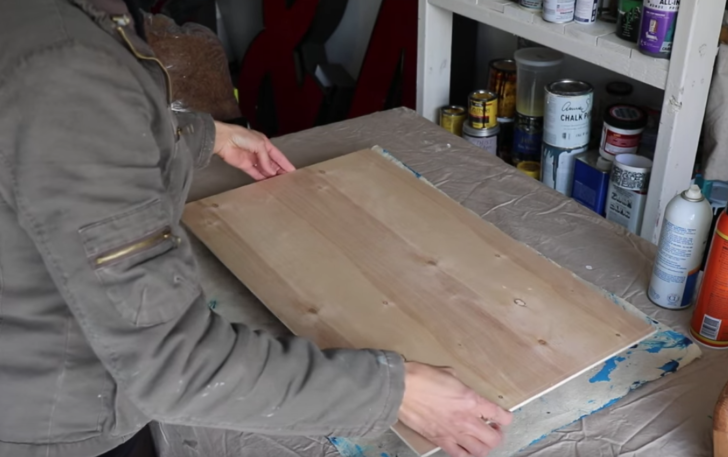
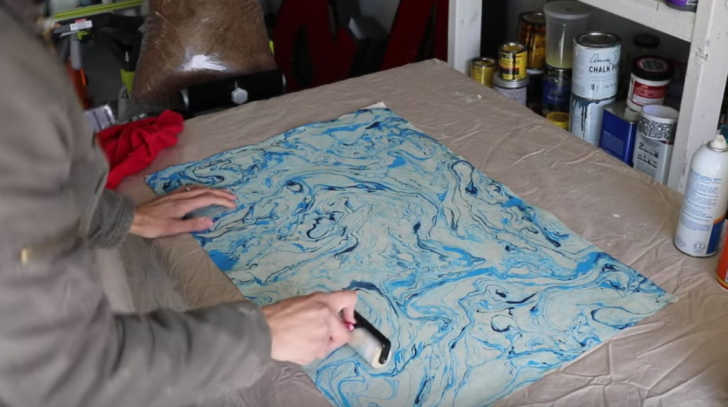
Time for the fun paper! By using a spray on adhesive, she was able to easily secure the paper to the wood, making sure to cut out the divot with a box cutter so she could fit it together again.
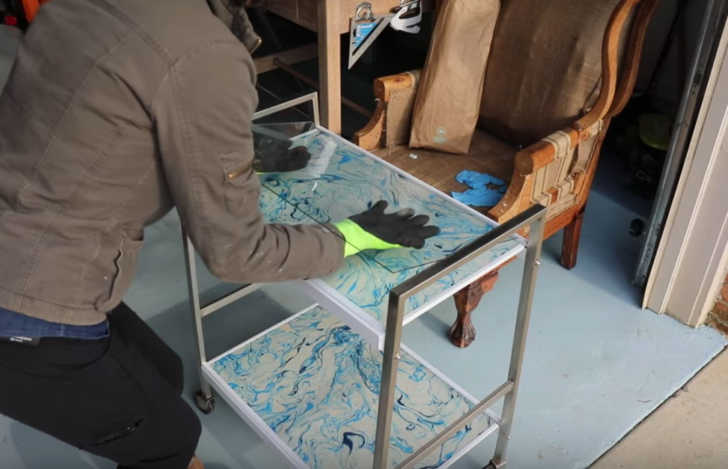
Perhaps the most important take-away from this project is to always, always sample your work before doing it on the final product! Case in point: she wanted to seal the shelves with epoxy, but after a test, she realized it turned the paper see-through, which wasn’t her intended outcome. So, she decided to go with a glass top, which she was able to get cut for her at the hardware store.
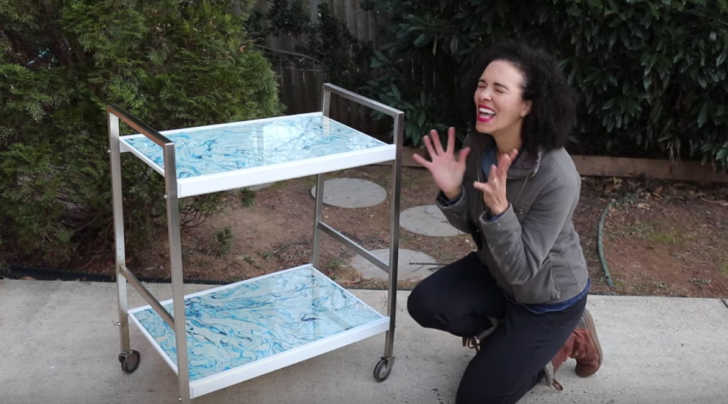
As you can see, our DIYer is super pleased with the end result, and it’s easy to see why! Go ahead and watch the video below for a more in-depth explanation of the steps, and get inspired to take advantage of some old thrift store finds today!
SKM: below-content placeholderWhizzco for DOT